ReactJS Reactstrap 轮播组件
Reactstrap 是一个流行的前端库,易于使用 React Bootstrap 4 组件。该库包含用于 Bootstrap 4 的无状态 React 组件。 Carousel 组件允许用户显示滑动项,并且在同一级别有一组内容时使用。我们可以在 ReactJS 中使用以下方法来使用 ReactJS Reactstrap Carousel 组件。
轮播道具:
- activeIndex:用于控制当前活动的可见幻灯片。
- next:是点击next按钮时触发的回调函数。
- previous:是一个回调函数,当点击上一个按钮时触发。
- 键盘:用于指示轮播是否应对键盘事件做出反应。
- pause:用于根据不同的鼠标事件暂停幻灯片。
- Ride:用于在用户手动循环第一项后自动播放轮播。
- 间隔:用于延迟这些项目自动循环运动之间的时间。
- children:用于将子元素传递给该组件。
- mouseEnter:是鼠标进入轮播时触发的回调函数。
- mouseLeave:是鼠标退出轮播时触发的回调函数。
- slide:用于启用幻灯片之间的动画。
- cssModule:用于表示样式的 CSS 模块。
- enableTouch:用于指示轮播上的触摸手势是否有效。
CarouselItem 道具:
- tag:用于表示该组件的标签。
- in:用于表示是否显示某个项目。
- cssModule:用于表示样式的 CSS 模块。
- children:用于将子元素传递给该组件。
- slide:用于启用幻灯片之间的动画。
CarouselControl 道具:
- 方向:用于表示下一个或上一个方向。
- onClickHandler:是一个点击时触发的回调函数。
- cssModule:用于表示样式的 CSS 模块。
- directionText:用于表示方向文本。
CarouselIndicators 道具:
- items:用于表示 items 数组。
- activeIndex:用于控制当前活动的可见幻灯片。
- cssModule:用于表示样式的 CSS 模块。
- onClickHandler:是一个点击时触发的回调函数。
CarouselCaption 道具:
- captionHeader:用于表示标题标题的值。
- captionText:用于表示标题文本值。
- cssModule:用于表示样式的 CSS 模块。
不受控制的旋转木马道具:
- items:用于表示 items 数组。
- 指示器:用于显示一组幻灯片位置指示器。
- controls :用于表示是否有控件。
- autoPlay:用于指示是否可以自动播放。
创建 React 应用程序并安装模块:
第 1 步:使用以下命令创建一个 React 应用程序:
npx create-react-app foldername第 2 步:创建项目文件夹(即文件夹名称)后,使用以下命令移动到该文件夹:
cd foldername第 3 步:创建 ReactJS 应用程序后,安装 必需的 模块使用以下命令:
npm install reactstrap bootstrap
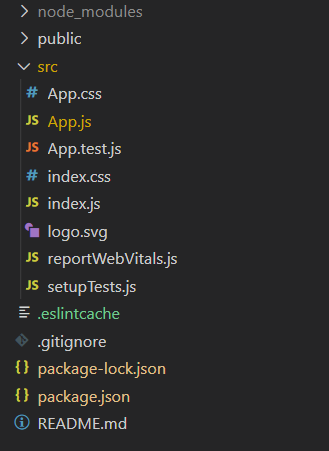
项目结构:它将如下所示。

项目结构
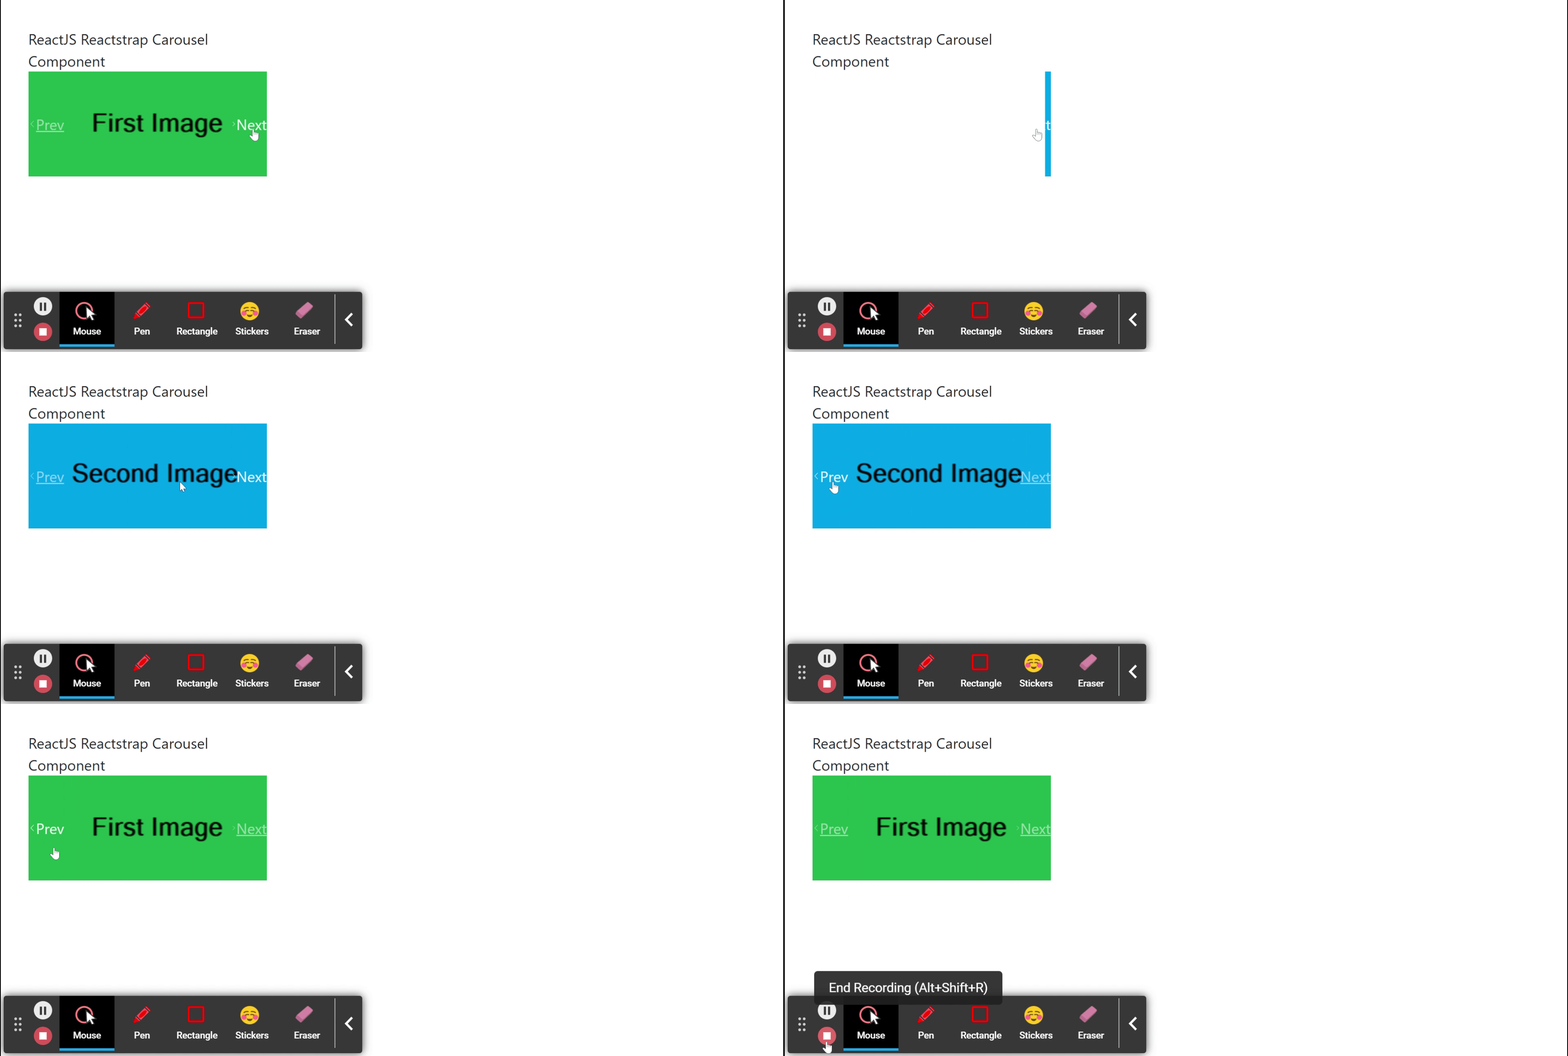
示例 1:现在在App.js文件中写下以下代码。在这里,我们使用了带有轮播控制按钮的轮播组件。
App.js
import React from 'react'
import 'bootstrap/dist/css/bootstrap.min.css';
import {
    CarouselControl,
    Carousel,
    CarouselItem,
    CarouselIndicators,
} from 'reactstrap';

function App() {

    // State for Active index
    const [activeIndex, setActiveIndex] = React.useState(0);

    // State for Animation
    const [animating, setAnimating] = React.useState(false);

    // Sample items for Carousel
    const items = [
        {
            caption: 'Sample Caption One',src:
'https://media.geeksforgeeks.org/wp-content/uploads/20210425122739/2-300x115.png',
            altText: 'Slide One'
        },
        {
            caption: 'Sample Caption Two',src:
'https://media.geeksforgeeks.org/wp-content/uploads/20210425122716/1-300x115.png',
            altText: 'Slide Two'
        }
    ];

    // Items array length
    const itemLength = items.length - 1

    // Previous button for Carousel
    const previousButton = () => {
        if (animating) return;
        const nextIndex = activeIndex === 0 ?
            itemLength : activeIndex - 1;
        setActiveIndex(nextIndex);
    }

    // Next button for Carousel
    const nextButton = () => {
        if (animating) return;
        const nextIndex = activeIndex === itemLength ?
            0 : activeIndex + 1;
        setActiveIndex(nextIndex);
    }

    // Carousel Item Data
    const carouselItemData = items.map((item) => {
        return (
             setAnimating(false)}
                onExiting={() => setAnimating(true)}
            >


        );
    });

    return (

            ReactJS Reactstrap Carousel Component

                 {
                        if (animating) return;
                        setActiveIndex(newIndex);
                    }} />
                {carouselItemData}


    );
}

export default App;
App.js
import React from 'react'
import 'bootstrap/dist/css/bootstrap.min.css';
import {
    Carousel,
    CarouselItem,
    CarouselIndicators,
} from 'reactstrap';

function App() {

    // State for Active index
    const [activeIndex, setActiveIndex] = React.useState(0);

    // State for Animation
    const [animating, setAnimating] = React.useState(false);

    // Sample items for Carousel
    const items = [
        {src:
'https://media.geeksforgeeks.org/wp-content/cdn-uploads/20190603152813/ml_gaming.png',
        },
        {src:
'https://media.geeksforgeeks.org/wp-content/cdn-uploads/20190528184201/gateexam.png',
        }
    ];

    // Items array length
    const itemLength = items.length - 1

    // Previous button for Carousel
    const previousButton = () => {
        if (animating) return;
        const nextIndex = activeIndex === 0 ?
            itemLength : activeIndex - 1;
        setActiveIndex(nextIndex);
    }

    // Next button for Carousel
    const nextButton = () => {
        if (animating) return;
        const nextIndex = activeIndex === itemLength ?
            0 : activeIndex + 1;
        setActiveIndex(nextIndex);
    }

    // Carousel Item Data
    const carouselItemData = items.map((item) => {
        return (
             setAnimating(false)}
                onExiting={() => setAnimating(true)}
            >


        );
    });

    return (

            ReactJS Reactstrap Carousel Component

                 {
                        if (animating) return;
                        setActiveIndex(newIndex);
                    }} />
                {carouselItemData}


    );
}

export default App;运行应用程序的步骤:从项目的根目录使用以下命令运行应用程序:
npm start输出:现在打开浏览器并转到http://localhost:3000/ ,您将看到以下输出:

示例 2:现在在App.js文件中写下以下代码。在这里,我们使用了没有轮播控制按钮的轮播组件。
应用程序.js
import React from 'react'
import 'bootstrap/dist/css/bootstrap.min.css';
import {
    Carousel,
    CarouselItem,
    CarouselIndicators,
} from 'reactstrap';

function App() {

    // State for Active index
    const [activeIndex, setActiveIndex] = React.useState(0);

    // State for Animation
    const [animating, setAnimating] = React.useState(false);

    // Sample items for Carousel
    const items = [
        {src:
'https://media.geeksforgeeks.org/wp-content/cdn-uploads/20190603152813/ml_gaming.png',
        },
        {src:
'https://media.geeksforgeeks.org/wp-content/cdn-uploads/20190528184201/gateexam.png',
        }
    ];

    // Items array length
    const itemLength = items.length - 1

    // Previous button for Carousel
    const previousButton = () => {
        if (animating) return;
        const nextIndex = activeIndex === 0 ?
            itemLength : activeIndex - 1;
        setActiveIndex(nextIndex);
    }

    // Next button for Carousel
    const nextButton = () => {
        if (animating) return;
        const nextIndex = activeIndex === itemLength ?
            0 : activeIndex + 1;
        setActiveIndex(nextIndex);
    }

    // Carousel Item Data
    const carouselItemData = items.map((item) => {
        return (
             setAnimating(false)}
                onExiting={() => setAnimating(true)}
            >


        );
    });

    return (

            ReactJS Reactstrap Carousel Component

                 {
                        if (animating) return;
                        setActiveIndex(newIndex);
                    }} />
                {carouselItemData}


    );
}

export default App;
运行应用程序的步骤:从项目的根目录使用以下命令运行应用程序:
npm start输出:现在打开浏览器并转到http://localhost:3000/ ,您将看到以下输出:

参考: https://reactstrap.github.io/components/carousel/